护宝康案例源码及数据库学习报告
源码下载
页面结构
- 首页
- 社区关怀页
- 预防知识页
- 预防知识详情页
- 社区活动页
- 社区活动详情页
- 积分兑换页
- 积分兑换详情页
- 预防知识页
- 健康档案页
- 数据分析页
- 测量记录页
- 用药记录页
- 家人关爱页
- 绑定家人信息页
- 编辑病人基本信息页
- 录入用药信息页
- 用药提醒页
- 健康数据阀值页
- 症状关怀页
- 复诊提醒页
全局
第三方框架的引入
具体引入方式参考第三方框架的官方文档:
将 uview-ui 和 colorui 文件夹导入到工程文件根目录,并在相关文件中配置该框架。
相关代码
<style lang="scss">
    /*每个页面公共css */
    @import "uview-ui/index.scss";
    @import "colorui/main.css";
    @import "colorui/icon.css";
</style>
{
    "easycom": {
        "^u-(.*)": "@/uview-ui/components/u-$1/u-$1.vue"
    },
    ...
}
...
// #ifndef VUE3
import Vue from 'vue'
import util from '@/common/util.js';
import cuCustom from './colorui/components/cu-custom.vue'
Vue.component('cu-custom',cuCustom)

// 引入全局uView
import uView from 'uview-ui'
Vue.use(uView);
Vue.prototype.$util = util
Vue.config.productionTip = false
App.mpType = 'app'
const app = new Vue({
    util,
    ...App
})

// 引入uView对小程序分享的mixin封装
let mpShare = require('uview-ui/libs/mixin/mpShare.js');
Vue.mixin(mpShare)
// http拦截器,此为需要加入的内容,如果不是写在common目录,请自行修改引入路径
import httpInterceptor from '@/common/http.interceptor.js'
// 这里需要写在最后,是为了等Vue创建对象完成,引入"app"对象(也即页面的"this"实例)
Vue.use(httpInterceptor, app)
...
@import 'uview-ui/theme.scss';
配置网络接口
知识点
在uni-app开发过程中,通常我们可以使用 common 文件夹来存放一些通用的资源文件或者组件,这些资源或组件可以被整个应用程序共享和重用。因此,我们可以在工程文件根目录手动创建 common 文件夹,再将网络接口地址封装进去,以便后续调用。
相关代码
const httpImgUrl = "https://minios.anyangyiju.com/snake/";
const httpUrl = "https://edu.gino4cloud.com";
const deptId = "";
export default {
    httpUrl,
    httpImgUrl,
}
首页
获取用户基本信息
知识点
在用户刚打开此应用(小程序)时就获取用户的基本信息(包括头像、昵称、地区等),我们需要将获取的方法编写在首页的
script部分。而获取用户个人信息的操作应是不影响用户正常访问的,所以该操作需要使用async关键字来将此方法变为异步操作。uni.showModal()方法用于显示模态弹窗,可以只有一个确定按钮,也可以同时有确定和取消按钮。getUserProfile()方法用于获取用户信息
编写思路
在 methods 部分编写 getUserProfile() 方法,使用微信小程序的 wx.getUserProfile 方法获取用户微信个人信息。在 onShow() 方法中编写弹窗代码,使获取用户信息的弹窗在首页渲染完成时就弹出,使用 uni.showModal() 方法弹出弹窗,当用户选择确定时则通过 getUserProfile() 方法获取信息,若点击取消则不获取信息。
相关代码
    import config from "@/common/config.js"
    export default {
        ...
        async onShow() {
            if (!uni.getStorageSync('userInfo')) {//获取用户头像、昵称、地区
                // this.popAuth = true
                var that=this
                uni.showModal({
                    title: '提示',
                    showCancel:false,
                    content: '需要获取您的头像昵称等信息进行展示',
                    success: function (res) {
                        if (res.confirm) {
                            that.getUserProfile()
                            console.log('用户点击确定');
                        } else if (res.cancel) {
                            console.log('用户点击取消');
                        }
                    }
                });
            } else {
                this.userData = uni.getStorageSync('userInfo')
            }
        },
        methods: {
            getUserProfile(e) {
                // 推荐使用wx.getUserProfile获取用户信息,开发者每次通过该接口获取用户个人信息均需用户确认
                // 开发者妥善保管用户快速填写的头像昵称,避免重复弹窗
                if (!uni.getStorageSync('userInfo')) {
                    wx.getUserProfile({
                        desc: '用于展示您的资料', // 声明获取用户个人信息后的用途,后续会展示在弹窗中,请谨慎填写
                        success: (res) => {
                            console.log(res);
                            uni.setStorageSync('userInfo',res.userInfo);
                            this.popAuth = false;
                        }
                    })
                }
            },
        ...
        }
    }
底部导航栏
底部导航栏可以使用 uni-app 自带的 tabBar 配置属性来实现。
实现效果
相关代码
    "tabBar": {
        "selectedColor": "#17BB8A",
        "backgroundColor": "#ffffff",
        "list": [{
                "iconPath": "/static/jilu.png",
                "selectedIconPath": "/static/jilu1.png",
                "pagePath": "pages/index/index",
                "text": "日常记录"
            },
            {
                "iconPath": "/static/shequ.png",
                "selectedIconPath": "/static/shequ1.png",
                "pagePath": "pages/shequ/shequ",
                "text": "社区关怀"
            },
            {
                "iconPath": "/static/fenxi.png",
                "selectedIconPath": "/static/fenxi1.png",
                "pagePath": "pages/fenxi/fenxi",
                "text": "健康档案"
            },
            {
                "iconPath": "/static/wo.png",
                "selectedIconPath": "/static/wo1.png",
                "pagePath": "pages/wo/wo",
                "text": "家人关爱"
            }
        ]
    }
社区关怀页
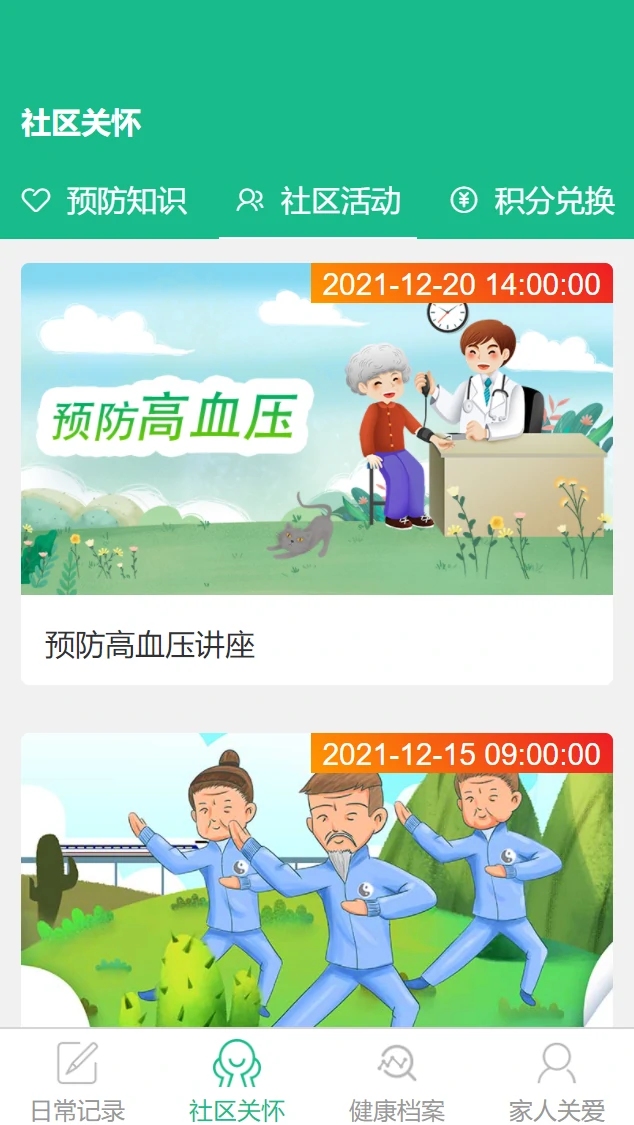
标签栏
在标题栏下方设置横向标签栏,用户可通过标签栏快速切换不同的页面,但本质上不改变应用层面上的页面。
实现效果
编写思路
在布局部分添加 scroll-view 组件作为标签栏,在该组件中添加 view 组件作为标签,各个 view 组件中设置动态的 class 属性,判断当当前选中页面为标签对应页面时改变标签的样式。各标签页的 view 组件使用 v-if 属性来实现选中哪个标签显示对应标签页,未选中的标签页自动隐藏的效果。
相关代码
<template>
    <view>
        ...
        <scroll-view scroll-x class="bg-self light nav">
            <view class="cu-item text-xl" :class="0==TabCur?'text-white cur':''" @tap="tabSelect" data-id="0">
                <text class="cuIcon-like margin-right-sm"></text> 预防知识
            </view>
            <view class="cu-item text-xl" :class="1==TabCur?'text-white cur':''" @tap="tabSelect" data-id="1">
                <text class="cuIcon-friend margin-right-sm"></text> 社区活动
            </view>
            <view class="cu-item text-xl" :class="2==TabCur?'text-white cur':''" @tap="tabSelect" data-id="2">
                <text class="cuIcon-recharge margin-right-sm"></text> 积分兑换
            </view>
        </scroll-view>
        ...
    </view>
</template>
网络接口获取数据
以社区活动页为例,通过网络接口获取活动的标题、封面、日期等信息,并将其以列表的形式显示在社区活动页上。
实现效果

编写思路
使用 uview-ui 第三方框架自带的 $u 对象的 get 方法来获取相关信息,解析后存入 receiveData 变量,布局部分再读取这个变量中的内容,即可实现社区活动列表的效果。
相关代码
布局部分
<template>
    <view>
        <view v-if="TabCur==1">
            <view @click="activityClick(item)" class="cu-card case" v-for="(item,index) in receiveData" :key="index">
                <view class="cu-item shadow ">
                    <view class="image">
                        <image
                            :src="item.coverImg != null && item.coverImg !='' ? httpImgUrl + item.coverImg : 'https://www.lordor.com/uniapp/hkb/image2.jpg'"
                            mode="widthFix"></image>
                        <view class="cu-tag bg-gradual-orange text-xl">{{item.startTime}}</view>
                    </view>
                    <view class="cu-bar margin-left margin-right">
                        <text class="text-cut text-xl">
                            {{item.name}}
                        </text>
                    </view>
                </view>
            </view>
            <u-loadmore :status="loadMoreStatus" icon-type="flower" :load-text="loadText" @loadmore="loadmore()" />
        </view>
    </view>
</template>
程序部分
    import config from '@/common/config'
    export default {
        methods: {
            ...
            //获取社区活动数据
            getActivityData() {
                this.$u.get("/hbkactivity/findActivityPage", this.page).then(res => {
                    let records = res.data.records;
                    this.receiveData.push.apply(this.receiveData, records),
                        this.page.current = res.data.current;
                    this.page.total = res.data.total;
                    if (this.page.current * this.page.size < this.page.total) {
                        this.loadMoreStatus = "loadmore";
                    } else {
                        this.loadMoreStatus = "nomore";
                    }
                })
            },
            ...
        }
    }
页面之间的数据传输
在文章(或活动)列表点击任意一项可进入查看详情信息,但这需要页面跳转的同时传输一些数据用来确定详情页需要读取的是列表项对应的内容。
知识点
JSON.stringify() 方法用于将 json 格式的数据转换成字符串类型。
编写思路
在页面跳转时,让 url 携带相关数据,进入详情页后再读取传输的数据。
相关代码
列表页(以社区活动为例)
    import config from '@/common/config'
    export default {
        ...
        methods: {
            ...
            activityClick(data) {
                uni.navigateTo({
                    url: '/pages/shequ/activityDetail?data=' + encodeURIComponent(JSON.stringify(data))
                })
            },
            ...
        }
    }
社区活动详情页
    import config from '@/common/config'
    export default {
        data() {
            return {
                httpImgUrl:config.httpImgUrl,
                receiveData: {
                    content: "",
                    name: ""
                },
            }
        },
        onLoad(option) {
            // 读取传输过来的数据
            let data = decodeURIComponent(option.data);
            option = JSON.parse(data);
            this.receiveData = option;
            if(this.receiveData.content!=''&&this.receiveData.content!=undefined&&this.receiveData.content!=null){
                var reg = new RegExp( '/admin/sys-file/snake/' , "g" )
                this.receiveData.content = this.receiveData.content.replace( reg , this.vuex_httpImgUrl );
            }
        },
        methods: {
            // 返回
            goBack(){
                uni.navigateBack();
            },
        }
    }
健康档案页
添加用药记录
在健康档案页中可通过点击按钮触发一个浮窗供用户输入信息及上传图片。
实现效果

知识点
u-upload组件用于实现文件上传功能。picker组件是日期选择框,用于选择日期。其中 start 和 end 属性分别设置其可选择的起始日期和最后日期。
相关代码
浮窗布局核心代码
<view class="cu-modal bottom-modal" :class="modalName=='bottomModal'?'show':''">
    <view class="cu-dialog">
        <view class="cu-bar bg-white">
            <view class="action text-green" @click="saveData">确定</view>
            <view class="action text-blue" @tap="hideModal">取消</view>
        </view>
        <view class="cu-form-group solid-top padding-sm">
            <view class="text-xl">医院名称</view>
            <input placeholder="输入药品名称" v-model="form.name" name="input"></input>
        </view>
        <view class="cu-form-group solid-top padding-sm">
            <view class="text-xl margin-right-sm">日期</view>
            <picker mode="date" :value="date" start="2015-09-01" end="2050-09-01" @change="dateChange">
                <view class="picker">
                    {{date}}
                </view>
            </picker>
        </view>
        <view class="cu-bar bg-white margin-top">
            <view class="action">
                图片上传
            </view>
        </view>
        <view class="cu-form-group">
            <u-upload ref="uUpload" :custom-btn="true" :action="action" :file-list="fileList"
                :deletable="true" @on-remove="onRemove" :max-count="1" @on-change="onChange"
                @on-choose-complete="onChooseComplete" del-bg-color="#000000" upload-text="上传图片"
                :header="header">
                <view slot="addBtn" class="slot-btn" hover-stay-time="150">
                    <u-image width="160rpx" height="160rpx" src='@/static/upload.png'
                        style="display: inline-block;"></u-image>
                </view>
            </u-upload>
        </view>
    </view>
</view>
浮窗显示功能核心代码
    import config from "@/common/config.js"
    export default {
        ...
        methods: {
            ...
            showModal(e) {
                this.modalName = e.currentTarget.dataset.target;
            },
            hideModal(e) {
                this.modalName = null
            },
            ...
        }
    }
浮窗表单及图片文件上传功能核心代码
    import config from "@/common/config.js"
    export default {
        data() {
            return {
                ...
                action: config.httpUrl + '/admin/sys-file/upload',
                fileList: [],
                lists: [], // 组件内部的文件列表
                form: {
                    remindType: "5",
                    name: "",
                    fileUrl: "",
                    remindDate: "",
                },
                date: "",
                remindList: [],
            }
        },
        ...
        methods: {
            saveData() {
                this.form.remindDate = this.date;
                this.form.openid = uni.getStorageSync("openid");
                this.$u.post("/hbkremind/saveOrUpdateRemind", this.form).then(res => {
                    this.$refs.uToast.show({
                        title: '保存成功',
                        type: 'success',
                    });
                    this.getDataList();
                });
                this.modalName = null;
                this.form.name = "";
                this.form.fileUrl = "";
                this.form.remindDate = "";
            },
            getDataList() {
                let params = {
                    openid: uni.getStorageSync("openid"),
                    remindType: "5"
                };
                this.$u.get("/hbkremind/findRemindList", params).then(res => {
                    this.remindList = res.data;
                })
            },
            dateChange(e) {
                this.date = e.detail.value;
                this.form.remindDate = e.detail.value;
            },
            onChange(res, index, lists) {
                console.log(res, index, lists);
                if (res.statusCode == 200) {
                    let arr = [];
                    if (this.form.fileUrl != null && this.form.fileUrl != "") {
                        arr = this.form.fileUrl.split(",")
                    }
                    arr.push(lists[index].response.data.fileName);
                    this.form.fileUrl = arr.toString();
                }
            },
            upload() {
                this.$refs.uUpload.upload();
            },
            onRemove() {
                let arr = this.form.fileUrl.split(",");
                arr.splice(index, 1);
                this.form.fileUrl = arr.toString();
            },
            onChooseComplete(lists, name) {},
        }
    }
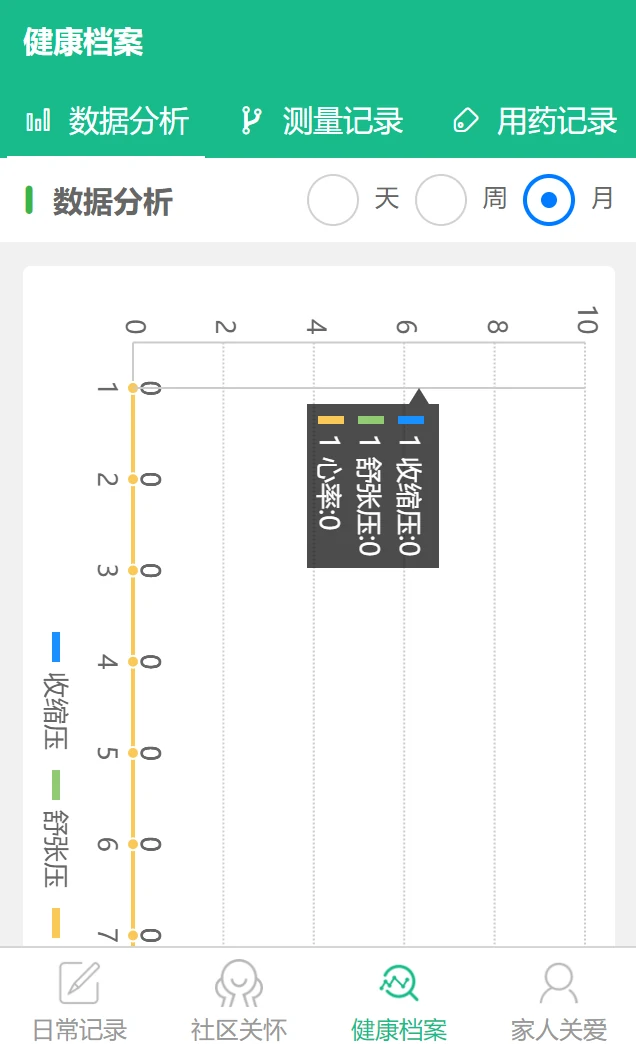
折线统计图
统计图表部分使用了 uCharts 第三方库,通过布局和程序部分简单编写就能生成一张美观的图表。
实现效果

知识点
在 uCharts 第三方库的 qiun-data-charts 组件中,我们可以通过修改 type 属性的值来更改图表类型,以下是一些常用的图表类型及其对应的 type 属性值:
| 图表名称 | type 属性值 |
|---|---|
| 柱状图 | column |
| 条状图 | bar |
| 折线图 | line |
| 散点图 | scatter |
| 饼图 | pie |
| 地图 | map |
其他图表样式或具体代码请参考 uCharts 官方网站
相关代码
布局部分
<view class="charts-box">
    <qiun-data-charts type="line" :chartData="chartData" background="none" />
</view>
程序部分
    import config from "@/common/config.js"
    export default {
        data() {
            return {
                ...
                chartData: {
                    categories: [

                    ],
                    series: [

                    ],
                },
                ...
            }
        }
        methods: {
            ...
            setBorderSize(e) {
                let params = {
                    timeframe: e.detail.value,
                    openid: ""
                };
                this.$u.get("/hbkmeasurerecord/findCharData", params).then(res => {
                    if (res.data) {
                        let result = res.data;
                        this.chartData.categories = result.categories;
                        this.chartData.series = result.series;
                    }
                })
            },
            ...
        }
    }
家人关爱页
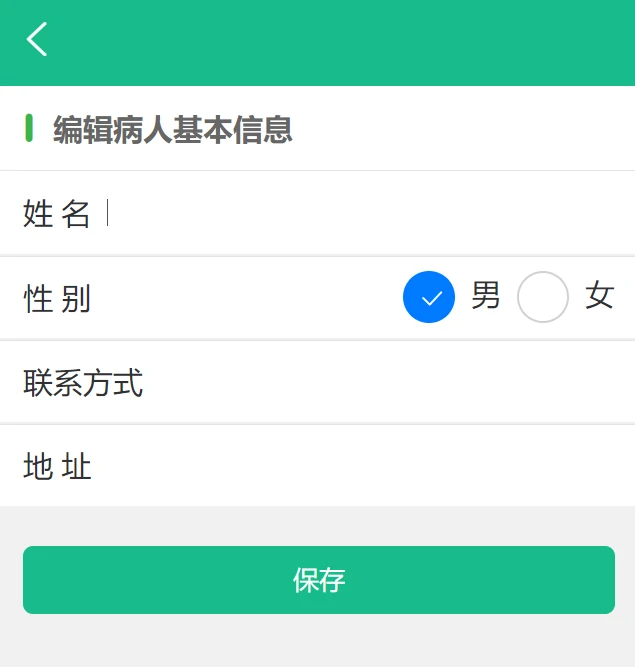
表单提交
通过布局中的文本输入框、单选框、多选框等组件组成一个简易的表单,再通过程序来读取输入的信息并将其上传至服务器。
实现效果

知识点
- 在 data() 方法中,我们可以定义一个对象的变量,一个对象中可以包含多个不同类型的变量。
- 从服务器读取数据时用
get方法,将数据传输至服务器的同时读取返回数据用post方法。
相关代码
    export default {
        data() {
            return {
                form: {
                    name:"",
                    sex:"",
                    tel:"",
                    address:"",
                    id:"",
                },
            }
        },
        ...
        methods: {
            radioChangeSex(e){
                this.form.sex=e.detail.value;
            },
            saveData(){
                this.form.openid = uni.getStorageSync("openid");
                this.$u.post("/hbkuser/saveOrUpdateUser",this.form).then(res=>{
                    let result = res.data;
                    this.form.id = result.id;
                    this.$refs.uToast.show({
                        title: '保存成功',
                        type: 'success',
                    });
                })
            },
            ...
        }
    }